Related Posts with Thumbnails
Showing posts with label seed starting. Show all posts

Friday, April 9, 2010

Pictures of the garden

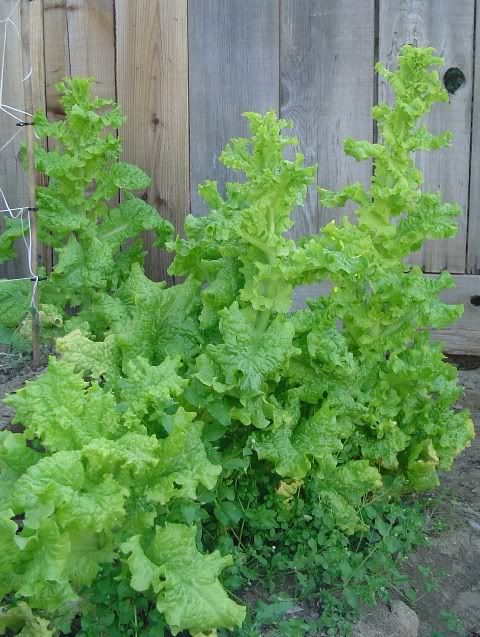
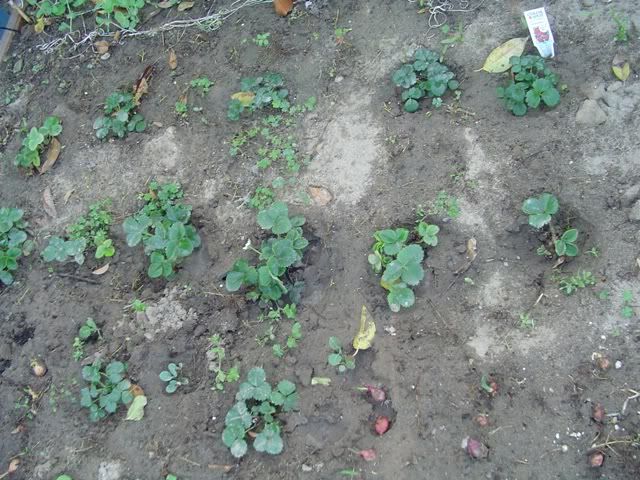
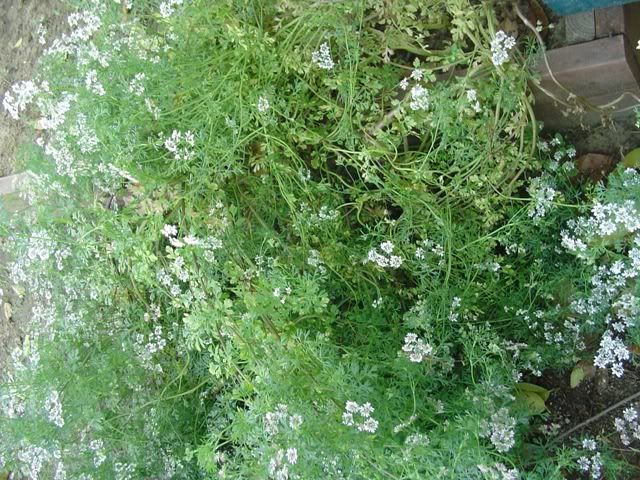
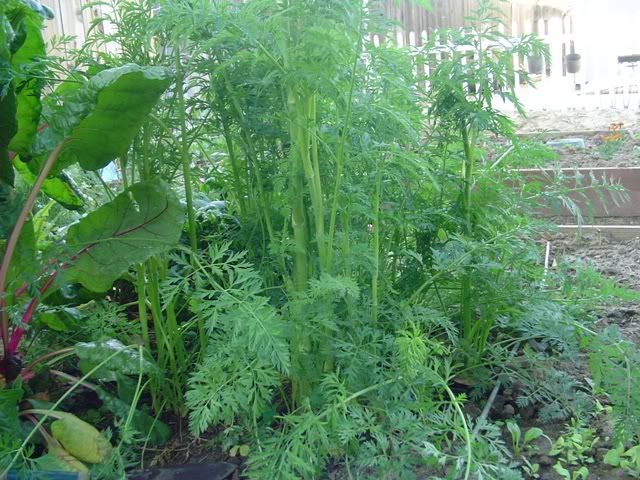
Everything is progressing nicely. Too much to blog about so I will show you in pictures :) Be prepare for lots of green foliage!

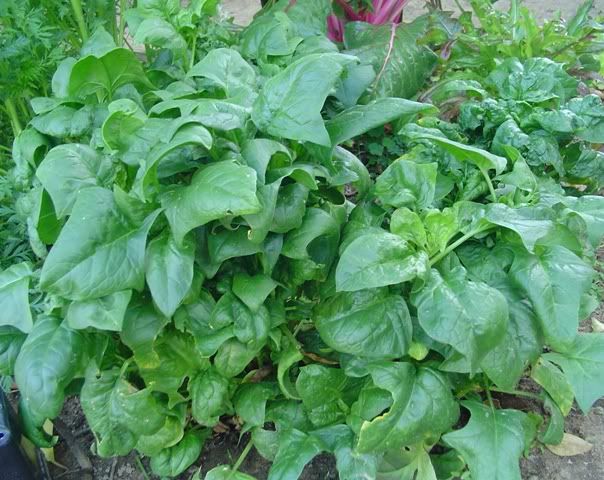
Spinach

 Lettuce volunteers

Strawberries

Cilantro

Carrots

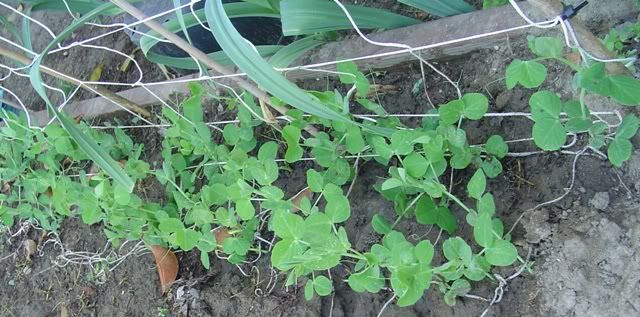
Peas

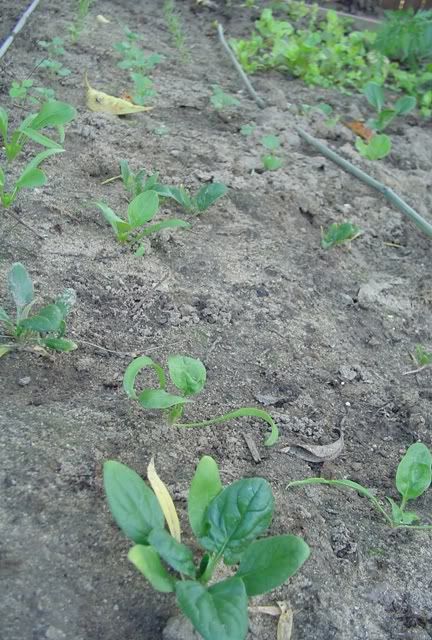
Spinach seedlings

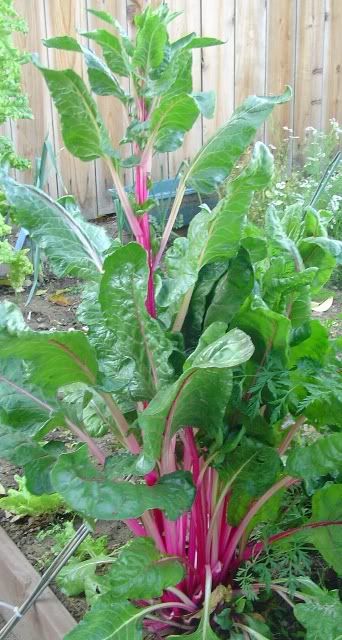
Swiss Chard

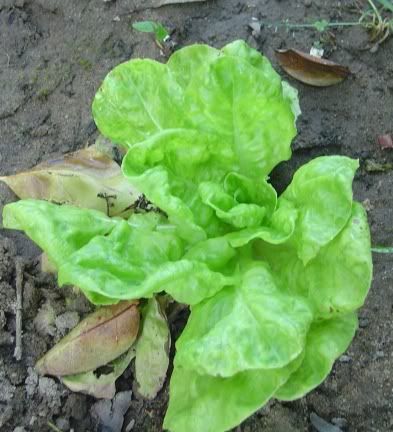
Bibb lettuce

Thursday, April 8, 2010

Garden Update and Happy Easter!

My garden last summer :)

There is so much going on in the garden, I don't know if I can remember everything. I'll try though. Yesterday, I planted out my bell peppers that I got at Rite Aid. The variety is called California Wonder, which is a popular open pollinated variety. There were 8 to 10 plants so I planted them in my second raised bed. I also have marigolds planted in between the plants to bring some color and I have heard they are a good pest deterrent as well. I also planted my bok choi transplants in the ground. I watered them with a fish emulsion mixture.

Everything I planted in the ground, except for some carrots, arrugula, cilantro, and pumpkins (I planted these on Sunday) are sprouting. I also found that I have bean seedlings from last fall. I let some plants go to seed and they are already coming up. :) Oh how I love mother nature!

My heating mat experiment update:

This is going so well. I was pleasantly surprised at how well this thing works. Within a couple of days, I had sprouting. I already have a banana pepper seedling, another ca wonder pepper, supersweet tomato, little prince eggplant, and more! I've also began pre-germinating my bean, pumpkin, sunflower, cucumber, and squash seeds. To see how I pregerminate my beans, check out this link. It is super easy. I found that if I do that and place them on my heating pad, I'll get sproutage in 2-3 days! Yeah for the heating mat. I'll do a more in depth review once the season has started.

I hope everyone had a wonderful Easter. We did. It was a great day of catching up and of course the adult Easter Egg hunt (my shoes were muddy) :) Can't wait until next year!

Wednesday, March 31, 2010

Seed Sowing List 03-30-10


Calendula Pacific Beauty (American Seed)
Coleus, rainbow mix (Ferry Morse)
Peruvian Pepper (Seeds of Change)
Sweet Pea, royal mix colors (unknown)
Nasturtium, jewel mixed colors (Bentley Seeds)
Marigold, crackerjack (American Seed)
Lettuce, garden babies butterhead (Renee's Garden)
Onion, white bunching (Bentley Seeds)
Sweet corn, early golden banthan (American Seeds)
Tomato, micro tom (Seedman)
Poached egg plant (Thompson and Morgan)
Lamb's ears (Groco  Seeds)
Eggplant, white bianca (Seedman)

Monday, March 29, 2010

Seed Sowing List 03-29-10

 Picture of lettuce, tomato, and garlic in Spring 2009

Today's seed sowing list is full of herbs,corn, lettuce and flowers:

Herbs:
  • Lemon balm (Groco Seeds) 
  • Cilantro (American Seed) 
  • Sage (Burpee) 
  • Oregano (Groco Seeds) 
  • Fennel, Florence (Burpee) 
  • Dill (trade) 
  • Asparagus (trade) 
Lettuce:
  • Baby romaine (trade) 
 Flowers:
  • Snapdragon first ladies mixed (Sow n Grow)
  • Morning Glory giant mixed colors (Sow n Grow) 
  • Four o Clocks mix (Burpee) 
Corn:
  • Popcorn (my own kitchen) 
  • Corn Chinese baby (trade)

Sunday, March 28, 2010

Today's Seed Sowing List

Today, I planted carrots in one of my raised beds. I planted Ferry Morse Long Imperator #58 and Chantenay carrots. I read that carrot seeds take longer to germinate because of a natural growth inhibitor in the seeds. I will have to wait 14-21 days to see any signs of growth.

The other day, I planted the following:

Tomatoes:
  • Beefsteak x4 (American Seed) 
  • Tomatillos x3 (Renee's Garden) 
  • Red current x3 (Burpee) 
  • Jelly Bean x3 (Walmart Gardens) 
  • Supersweet x3 (Burpee) 
  • Marglobe x4 (Groco seeds) 
Peppers:
  • Pimento x4 (Ferry Morse) 
  • Jalapeno early x3 (Burpee) 
  • California Wonder x8 (American Seed and Ferry Morse) 
  • Habanero x3 
Eggplants
  • Rosa Bianca x3 (Renee's Garden)
  • Beatrice x3(Renee's Garden)
  • Nadia x3 (Renee's Garden)

Today's Seed Sowing: Carrots, Tomatoes, Peppers, and Eggplants

Today, I planted carrots in one of my raised beds. I planted some Ferry Morse Long Imperator #58 and Chantenay carrots. I read that carrots take longer to germinate because of a natural growth inhibitor in the seeds. I will have to wait 14-21 days to see any signs of growth. I can’t wait.
The other day, I planted the following:
Tomatoes
Beefsteak x4 (American Seed)
Tomatillos x3 (Renee’s Garden)
Red Current x3 (Burpee)
Jelly Bean x3 (Walmart Gardens)
Supersweet x 3 (Burpee)
Marglobe x4 (Groco Seed)
Peppers:
Pimento peppers x4 (Ferry Morse)
Jalapeno early x3 (Burpee)
California Wonder x4 (American Seed)
California Wonder x4 (Ferry Morse)
Habanero x3 (unknown)
Eggplants:
Rosa Bianca x3 (Renee’s Garden)
Beatrice x3 (Renee’s Garden)
Nadia x3 (Renee’s Garden)

Hydrofarm Seedling Heat Mat Mini Review

Tonight I broke down and bought a Hydrofarm Seedling Heat Mat at my local garden store.

It was $24.95 and I had a 15% coupon making it around $21.00. On Amazon, they are around $25.00 dollars as well. I think it's a good deal if it works. I read great reviews on this product and am excited to try it out and provide my own review.

Most of the reviews on Amazon, people said to place a towel underneath the mat to draw heat upwards to your seed trays. I placed the mat on a cookie sheet on the floor, followed with a towel, then the heat mat, and my trays. After a couple of minutes of it plugged in, I could tell it was warm but I expected it to be much hotter than just warm. I placed my eggplant, tomato, and pepper seed trays on top and now we wait and see. The company claims it will raise the rooting area 10-20 degrees over the ambient temperature in the room. Regardless of what it says, I just want to get my tomato, pepper, and eggplant seeds to germinate faster.

This will be my little experiment over the next couple of weeks to see if this product really does work. Wish my luck everyone!

Friday, March 26, 2010

Growing Swiss Chard: the Colorful Spinach Substitute

Last year, I started growing swiss chard for the first time. I only grew several plants because I wasn't for sure if I would like the taste or not. Anywhoo, it grew like crazy and I was able to make one dish with it. I cooked it like spinach, sauteeing it with some olive oil and garlic. After it wilted a little, I added some lemon juice and red pepper flakes. It was a great side dish. Swiss chard is such an easy plant to grow and the varieties are endless. They have a variety called rainbow swiss chard and the colors are amazing. They're a perfect addition to any vegetable garden or a side plant in the front yard. They're a vegetable that I can't live without. What do you guys think about this one?
This year, I was determined to grow continuous crops of swiss chard. The first batch, I started in January. January 1st to be exact. They took a week to sprout and grew like mad. At first they were leggy and spinly but after a couple of weeks, they grew thick stems and strengthened up really well.

Swiss Chard Seedlings at 31 days

I moved them outside in the ground in an area that gets late morning sun, a couple of weeks before my last frost, around February 11th. They looked so puny and defenseless. To protect them from critters like the dreaded slugs and snails, I would cover them with plastic cups for the next two weeks at night and uncover them in the morning before work. It worked. The snails didn't get too much of them and they grew very well.
Swiss Chard Transplanted

So they grew and they grew without too many problems. Not a pest to be found. I'm still crossing my fingers! Here they are a month and a half later, still growing steadily:
Swiss Chard 59 days

And grew they did. I'll probably harvest these soon and make some yummy side dishes.

Swiss Chard 90 days

Here are some pics of the other swiss chard plants I have laying around the garden. I plan on planting them in a spot near my fence that gets regular morning sun. They really enjoy full sun but part sun wouldn't hurt them much.

Happy gardening everyone!

Wednesday, March 24, 2010

How to Germinate Bean Seeds: A tip

I thought I'd share a little tip I learned this week regarding how to germinate beans. They are the most peskiest seeds I've attempted this season. The story goes as follows: earlier last month, I tried sprouting some top crop beans in a six pack and before they had time to sprout, they rotted in the soil. I was saddened and disheartened.

I almost gave up trying but my coworker was telling me about these interesting purple podded pole beans that have purple pods and when cooked, the thing turns green. It was so intriguing to me. I had to go and find some. I received some seeds from a couple of my garden buddies via seed trades but I also bought a packet of seeds a week ago when I was at Lowes just perusing around and I saw on the Burpee's seed rack that there were some purple colored beans. They're a bush variety called "Sequoia" and they turn green when you cook them! I had to buy them! However, with my past history of unsuccessful attempts at sprouting bean seeds, I was a little weary that this packet of seeds wouldn't sprout and instead rot on me. I had a wondrous epiphany! In 2nd grade, I remember sprouting seeds-in fact bean seeds-in a wet paper towel in a jar. I was so excited that I finally found a way to sprout beans without wasting any seeds.

All you need is a jar or a zip lock baggie and a wet paper towel. Wet the paper towel and lay the seeds you want to sprout on top of the towel. Fold the towel over the seeds a couple of times and insert into plastic baggie. Place on top of a warm place. I use my fridge. Lastly but not least, you wait!
So, I tried this technique with some Italian Pole beans I had. And within 10 days, they've all sprouted. Here's a picture:

Italian Pole Beans Sprouting

Eureka, as those Californians would say! It worked. So a couple of days ago, I attempted putting some of my precious, hard to find Sequioa purple beans in a wet paper towel in a plastic baggie. I also wanted to try some Scarlett Runner beans as well. I hope to have beans all over the place!

Tuesday, March 23, 2010

Seed Sowing Update

The seeds I planted approximately 2 weeks ago have begun to sprout. I planted bok choi, 4 o clocks, broccoli, carrots (a round variety), spinach, mesclun mix, peas, beets, and more. I cannot remember everything I planted though. I always do this every year. I plant all these things and find out later I cannot recall what I planted. I’ll just wait until they’ve grown enough to distinguish what it is! I hope it’s not weed seeds though. For a great seed starting book, check out All New Square Foot Gardening: Grow More in Less Space!. I love the details and the precise information it provides.

Carrots Gardening and Growing Tips


Carrot Growing Tips

The story:

I began growing carrots last fall. I probably have 2 dozen carrots in the ground. Of course, I cannot recall what variety I grew. I have never had the pleasure of eating carrots from my own garden so this was a wonderful experience. When I planted them in fall, I crowded the seeds and never thinned them. This; however, has worked out for me. Out of the 6 I have already eaten, all of them were decent size, a quarter size I would guess or a tiny bit smaller than a quarter.

The first carrot we ate from the garden was a month ago in a salad. I decided to see how big the carrots had gotten over the winter and to my surprise it was a decent size one. It was terrible trying to get it out of the ground but after all the tugging, a beautiful orange, dirt-covered carrot appeared. I immediately went inside to show my husband and he was amused and bewildered with my excitement of my first carrot! I washed it and took a bite out of it. It was the sweetest, crunchiest, and freshest carrot I had ever eaten. I cannot describe the sweetness of these carrots. From then on, I vowed to have carrots in my planning guide for my garden always.

I have decided to plant both radishes and carrots together. Radishes are similar to carrots in that they are both root crops. Radishes; however, germinate quickly and mature faster than carrots. By the time the carrots need more space, the radishes will be ready to harvest.

Here are some tips I have learned in the past year of growing my own carrots!

-Thin seeds to 2-3 inches apart or sow 2-3 inches apart when setting seed out

-Carrots need well-drained and well-balanced soil to thrive. Any compacted soil filled with debris and rocks will produce deformed carrots. My soil is very sandy so the carrots did well

-Sow carrots as soon as the hard frost has passed. If you still have some frost, don’t worry, carrots can handle light frost

-Carrots aren’t picky with fertilizer. Good compost should be enough. Stay away from nitrogen rich fertilizers. Nitrogen promotes top green growth and less root development. Roots=carrots

-Watering: carrots hate being water-logged or being watered too much. Light watering will suffice

-For continuous harvest, stagger your plantings every two weeks.

-Pests: I didn’t have much pests around my carrots. However, carrots are prone to be infected with carrot root flies (they feed on roots) and flea beetles (they will attract other pests). To get rid of this, I would make a mixture of 2 tablespoon dish soap and 2 quarts of water and spray the areas that are affected.
Related Posts with Thumbnails